Sunday 11 June 2017

Father's Day Rosette Card

With Father's Day next week, I thought I would share a really quick and easy Father's Day Card Idea, that none the less looks very effective.
Father's Day Rosette Card
Card Recipe:
Tools: Tonic Studios Indulgence Tea Party Square Base DieRound Window Pour Me Die and Family Sentiments Die Pack, Scallop Circle Layering DiesGrand Calibur, Super Trimmer 
Paper and Card: Linen card, Stardream
Embellishments: Crystal Rhinestones

To make my filigree card base, I used the new Indulgence Tea Party Square Base Die following my Filigree Card Base Tutorial. This just makes such a delicate but striking card base.  Just because it's a card for a man, doesn't mean it can't have a little bit of bling, with some topaz coloured crystal rhinestones.
For the topper, I used the outer circle from the Pour Me dies. Then I cut a 3cm wide strip of card from the same card as I had used for the card base and scored it using the Super Trimmer to create a concertina fold.  The rosestte is created by simply glueing the two ends together, then pushing it flat and adhering to the card.  I covered the hole in the middle with a small scallop circle.

Finally, I used the Dad from the Family Sentiments Dies.

Hope you all have a great weekend! Pin It Now!

Thursday 25 May 2017

Masquerade Vogue Dress Card

Masquerade Vogue Dress Card

Masquerade Vogue Dress Card

Everything girly that I love on a card!
Card Recipe:
Stamp: Stamps Happen (Vogue Silhouette) 
Tools: Spellbinders - French Frills Die Set, Venetian Accents Die Set, Grand Calibur
Colouring Mediums: Martha Stewart Glitter Embossing Powder, Versamark
Paper and Card: First Edition, Conqueror, Stardream, 
Embellishments: Creative Expressions Pearl Swirls
Stamps Happen Vogue Silhouette Rubber Stamp
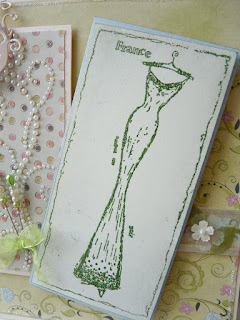
It's no secret that I love a fashion rubber stamp and this "oldie but a goodie" from Stamps Happen is one of my favourites. Its just so elegant but also versatile! This time I stamped the image using clear Versamark and then heat embossed with Martha Stewart Glitter embossing powder in a rich emerald green colour.

Now, I'm always a "more is more" kind of crafter, and this lovely stamp, which is tall and narrow left me with plenty of room to add quite a bit of frou-frou embellishment. 


Spellbinders Venetian Accents Die Set
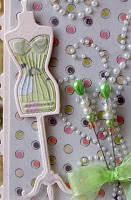
So I added a backing card decorated which I edged with a die cut from the Spellbinders Venetian Accents Die Set. I used the same die set to cut the fabulous Masquerade Mask. I also used Spellbinders French Frill Die Set to cut out the Mannequin form, using the innder die to paper-piece with an offcut from my backing paper. I finished this embellishment topper with a pretty pearl swirl topped with a pair of my signature hand-made hat pins. 
Spellbinders - French Frills Die Set


Hope you like this card and its good to be back! Pin It Now!

Monday 15 May 2017

Swirly Whirlies Owl Family Card

I just love owls, so I couldn't resist this wonderful Swirly Whirlies Owl Family stamp, it is just too cute, especially when paired with some lovely First Edition paper and kraft cardstock.
Swirly Whirlies Owl Family & First Edition Spring Feast Card
Card Recipe:
Stamp: Swirly Whirlies Owl Family (Little Claire), Happy Circular Sentiments (LOTV)
Colouring Mediums: Memento Cocoa Ink Pad, Tim Holtz Distress Ink Pad Antique LinenPromarkers
Paper and Card: First Edition Spring Feast, Kraft Card
Tools: Spellbinders Labels 8 Diet Set and Vintage Lace Accents, Tonic Studios Layering Squares and Layering CirclesGrand Calibur 
Embellishments: mulberry flowers, May Arts ribbon
Spellbinders Labels 8 Diet Set Card
I stamped both the main image and the sentiment using a Memento Cocoa Ink Pad, then coloured the main image using muted-coloured promarker pens, picking up the colours from the First Edition patterned backing paper before lightly tinting the background with a dusting of Antique Linen.
You can just see the beautiful embellished May Art ribbon that I used as a trim peaking out behind the stamped image. For a fun little detail, I added an offcut of the trim to the swirly branch. The stamped image and it's Kraft Card mat is cut using Spellbinders Labels 8 Diet Set, a really useful shape for cutting out landscape stamped images.
mulberry paper flowers
As I can't resist adornment, I created a corner cornucopia 0f mulberry paper flowers, mixing a variety of sizes from tiny cornflowers to a statement gardenia along with cherry blossoms, all in colours to coordinate with the First Edition background paper, which came from the Spring Feast collection.
LOTV Happy Birthday stamped Sentiment
Finally, I die cut the LOTV Happy Birthday stamped Sentiment using my ever-handy simple Layering Circles die, combined with the more ornate Spellbinders Vintage Lace Accents, which I think work together really well - but what do you think?

Pin It Now!

Saturday 18 March 2017

Die-Cut Filigree Dress Card for Mother's Day or Birthday | Tonic Studios Step-by-Step Tutorial #3

With Mothering Sunday just over a week away, I thought I'd film how to make this die-cut filigree dress card, as it would make a gorgeous Mother’s Day card layout. My Step-by-Step Video Card Tutorial features Tonic Studios Verso Indulgence dies (but you would be able to achieve a similar effect with other dies) and is a deceptively quick and easy card to make. This versatile card design idea could also be used for a homemade Birthday Card, too.

Card Recipe:

Tools: Tonic Studios Indulgence Boudior Square Base DieScallop Circle Layering Dies, Grand Calibur
Paper and Card: Linen card, Conqueror
Image: Katy Sue Designs Fabulous Fashion CD-Rom
Embellishments: Flatback pearls, mulberry flowers

Watch How to Make This Filigree Dress Card


Hope you all have a great weekend!
Pin It Now!

Wednesday 8 March 2017

How to Make a Marshall Paw Patrol Pup Birthday Cake - Video Cake Decorating Tutorial #1

Paw Patrol Cake Decorating Video Tutorial

Marshall Paw Patrol Pup Birthday Cake

Marshall Paw Patrol Pup Birthday Cake Face
Last week, my lovely niece turned 4 years old (where does the time go?) and she is absolutely mad about Paw Patrol. She’s been talking about having a Marshall Birthday Cake at her Paw Patrol party for, well, almost a year. And for it to be absolutely paw-perfect, it had to be of her favourite pup, which is Marshall


Paw Patrol Cake Decorating Video Tutorial

So, I've filmed a step-by-step cake decorating video tutorial on how I made this Marshall Paw Patrol cake, just click on the picture below to view!
If you're thinking that you could never do something like this, it may surprise you to know that this was my first attempt at a 3D character cake. My video breaks it down into "bite-size" (excuse the pun) steps, and I show you all the little tips and tricks I used such as using mini-flower cutters for Marhsall's Dalmatian spots. 
Making this cake was a labour of love (just over 20 hours to complete) but so worth it for the look on her face when she saw it. And was so thrilled with the way it turned out.

Edible Elements

 All the elements were edible, something my niece can attest to when she ate Marshall's fire-pup shield! And, if you watch the video to the end, you can see what I used to make the "glass" in Marshall's torch.

Would love to know what special birthday cakes you've made, do let me know in the comments below.


Equipment, Tools, Materials Used


Pin It Now!

Monday 13 February 2017

Pleated Heart Aperture TentFold Card | Step-by-Step Tutorial Tonic Studios Indulgence Dies


Gosh, I know that I've been away an age, but in celebration of both Galentine's or Valentine's Day, I'm sharing the love as well as my latest Step-by-Step Tutorial featuring Tonic Studios Indulgence Dies with my video on how to make this Pleated Heart Aperture TentFold Card from start to finish, just click on the picture below
I'll also show you how you can adapt this versatile card layout to make it a Birthday card, Mother's Day card ot Wedding or Engagement card.

Card Recipe:

Paper and Card: Textured, Prima, Stardream
Tools: Tonic Studios Affections Square Heart Base, Affections Heart On Mother's Day, EveryDay Sentiments Die Set 1Scallop Layering Squares, Grand Calibur 
Embellishments: flatback pearls and crystals

 
Pin It Now!

Tuesday 19 April 2016

Creating Hat Pins Video Tutorial: Step-by-Step Beaded Stick Pin Instructions


Creating Hat Pins & Beaded Stick Pins Step-by-Step

My first ever post on this blog was a  step-by-step instructions guide entitled "Creating Hatpins - A Tutorial" and it been incredibly popular, along with my follow-up post "Decorative Hat Pins - Next Steps." This all made it a natural choice to be part of my new Youtube Video Series showcasing my most popular projects.

Step-by-Step Video Tutorial

My quick and easy video guide to making beaded stick pins shows you how to make beautiful decorative hatpins to use in card and scrapbook projects. Discover how with just a few simple items, it’s so easy to make your own hatpins that coordinate perfectly with your project and they look so pretty too! Press play below to take a peek and watch!
If you enjoy watching it, please like it and subscribe to my youtube channel too, as I will film more videos if this series proves popular.
Pin It Now!

Friday 11 March 2016

Framed Lattice Statement Card Step-by-Step Video Tutorial Series

Framed Lattice Statement Card Step-by-Step Tutorial

Framed Lattice Statement Card

The most popular card on my blog is a large, special occasion statement card featuring Tonic Studios Boudoir Square Base and Layering Dies. I called it my Framed Lattice Card (you can see it pictured right), and it has been viewed and shared thousands of times. 
So, I thought I would do a step-by-step tutorial on how to make it, but this time I've filmed a video tutorial to walk you through the process. If you enjoy it, please like it and subscribe to my youtube channel too, as I will film more videos if proves popular.

Pin It Now!

Friday 20 February 2015

Mix & Match the Birdies!

Isn't it great when different craft products in your stash go together, almost as though you had plannned it?
Birdhouse Tall Birs Card Tonic Studios, Spellbinders, Hunkydory
Card Recipe:
Tools: Spellbinders Labels 18 Diet Set , Tonic Studios Birds on a BranchBirdhouse DieLayering Rectangles and Layering CirclesGrand Calibur 
Paper and Card: HunkydoryStardream Pearlescent Card
Embellishments: mulberry flowersMay Arts ribbon
As you will have noticed, I do like a lot of layers on my card!  For this card, I wanted to use a Hunkydory card toppers and cardstock set that I had in my stash, as the pink/purple colours were a favourite of the card recipient. The focal topper came in the set, and although I don't have an exact shape match in my dies, I was unabashed. Spellbinders Labels 18 echoed the shape of the topper and it shows perfectly that you do not need to have an exact match to still create a harmonious arrangement on your card.
I've also mixed and matched patterned cardstock and papers with coordinating plains and pearlescents.
I carried on the theme of the card with my die cut accent - a bird house cut from the same pink stardream card as my card base, mounted onto a pre-embossed strip of Hunkydory Adorable Scorable card.  I then used sprigs from the Birds on a Branch die set to create some final accents, picking up from the embossed foliage pattern on the card stock. These tucked behind the mulberry flower and floral organza ribbon as I often think a card is not finished if it doesn't have flowers and ribbon, I get kind of twitchy if I make a card without them!

Hope you all have a great a weekend and happy crafting!

Pin It Now!

Sunday 1 February 2015

Extending Square Dies to Cut Rectangles

Extending Square Dies to Cut Rectangles Step-by-Step Tutorial
This is a useful tutorial on how to get more out of your Square Dies by extending them to cut rectangles.

With this method, you can extend the length or the width, but not both!

At the end of the project, you will find a downloadable PDF of these instructions.

You will need some:
Square dies (eg Tonic Layering Squares)
Die cutting machine (eg Grand Calibur)
Cardstock


Step 1
Measure the outer edge of your square die.  In my example (excuse the slight blurriness of the first photo), my outer edge measures 9.8cm and I know that this cuts a 9.3x9.3cm square.  I know need to cut a piece of card that's length is exactly 9.8cm+the extra length I want to acheive. So if I want a rectangle that is 2cm longer ie 11.3cmx9.3cm, I need to cut a piece of card that is exactly 9.8cm+2cm = 11.8cm.  The width doesn't matter as long as it is a bit wider than the die.
Step 1 Extending Square Dies to Cut Rectangles Step-by-Step
Step 2
Butt the edge of the die to the bottom edge of your piece of card and tape into place.  Place this on the cutting plate so that the other end of the die comes off the end of mat (below left). Cut and then emboss this piece (below middle).  You will now have a piece of card cut along thrtee sides (below right).
Step 2 Extending Square Dies to Cut Rectangles Tutorial
Step 3
Remove the card from the die, and re-allign the die flush to the opposite end of the cardstock. Manoeuvre  the die so that the cut edges slot into place (this can be a little fiddly but you will feel it when it gets seated correctly, and I find it helps if you trim off the outer flaps).  Tape into place, making sure the it is now the end that has already been die cut that is off the edge of the cutting mat.  Cut and emboss again.
Step 3 Extending Square Dies to Cut Rectangles stages


You should now have a perfectly die cut and embossed rectangle.

You can download a pdf of these instructions here.

Please do let me know if you have found this helpful, I love to read your feedback.


Pin It Now!
Related Posts Plugin for WordPress, Blogger...